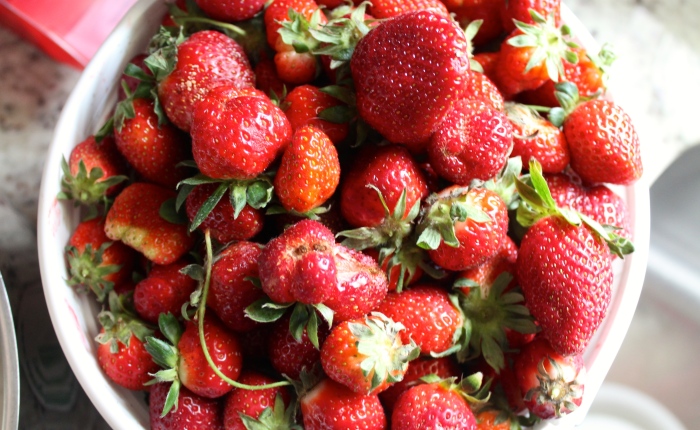
It’s finally strawberry season! We’re lucky enough to live in an area where strawberry picking farms are close enough to visit on weekends. I’ve been trying to go over the past few years but something always happened that made it impossible to visit one before strawberry season passed. Thankfully this year, I took a friend’s birthday as an opportunity to bond while picking our own strawberries, enjoying the sunshine on a Saturday morning outside before the Georgia heat got too rough.
I’d never canned anything before this, but I’d heard enough about canning kits and various pots of boiling water to know that I didn’t have the time or patience to do it all. Those canning processes are also meant to make food last for months which was something I was willing to sacrifice. Instead, I went for a simplified version, boiling the jars and tops for 15 minutes to kill off any bacteria but then freezing the leftover jam instead of resealing the jars properly in boiling water.
This recipe is adapted from the Martha Stewart Quick Strawberry Jam guide which involves mashing the berries in a food processing to speed up the process. I ended up going more traditional, letting the berries cook and then mashing them.
For my recipe I used:
1 gallon of strawberries, de-stemmed
3 cups of sugar
lemon juice from 2 lemons (around 1/4 cup)
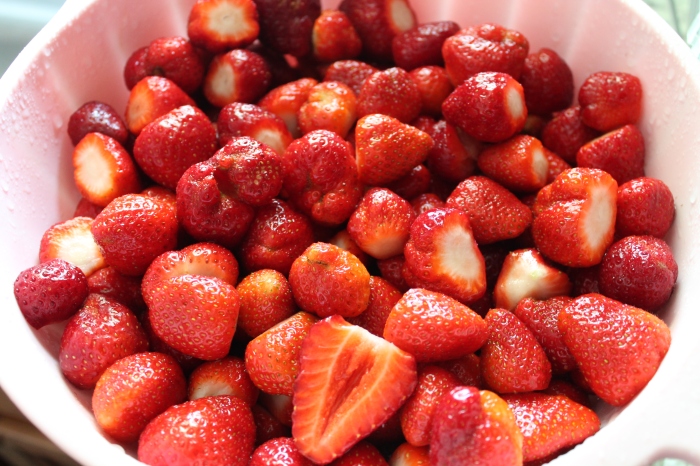
Step 1: Clean and De-stem the Strawberries
I picked these strawberries from a farm less than an hour away from the house (I know, very Ina Garten). It was a lot of fun and a wonderful way to make myself get up before 11 am on a Saturday morning so I wholeheartedly recommend visiting a picking farm if there’s one in your area! I doubt store bought (or even honestly, frozen and thawed) strawberries would make a very significant difference, so if you can’t make it to a farm still give the jam a try!
Step 2: Set to Simmer

I added all the strawberries to a heavy bottomed pot with the sugar and lemon juice, giving it a bit of a stir to kind of coat everything in the mixture and set it to boil on medium heat. Once the berries had been cooking for about half an hour and started to boil I picked up a potato masher and got to work turning the fruits into pulp. It was straight forward and pretty effortless and didn’t require me dirtying the food processor!
Step 3: Boil to Thicken and Can
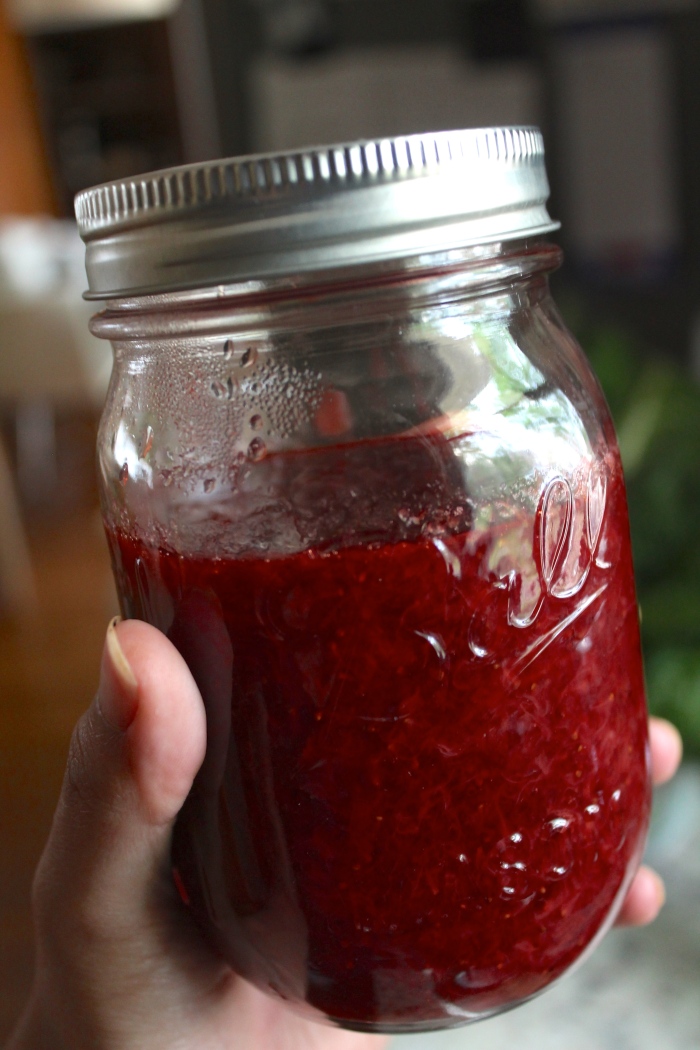
Once it started boiling I lowered the heat to medium-low to keep the juice from splashing all over the stove (and my arms) but still high enough for it to thicken into a gel. I didn’t use pectin in this recipe and I had no problems with the jam setting. I let it cook until the consistency was thicker but while hot it was still runny like strawberry syrup. Once it cooled, it definitely turned into jam so don’t despair and go running for pectin if you don’t have it! My gallon of strawberries yielded 3 and a half 2oz jars (with about 3/4 of an inch of space from the lip for expansion in the freezer). I let them all cool with the jar open until they reached room temperature and then popped them in the fridge. The half jar I’m using first, and the other 3 went into the freezer after cooling down again.
Step 4: Enjoy it!
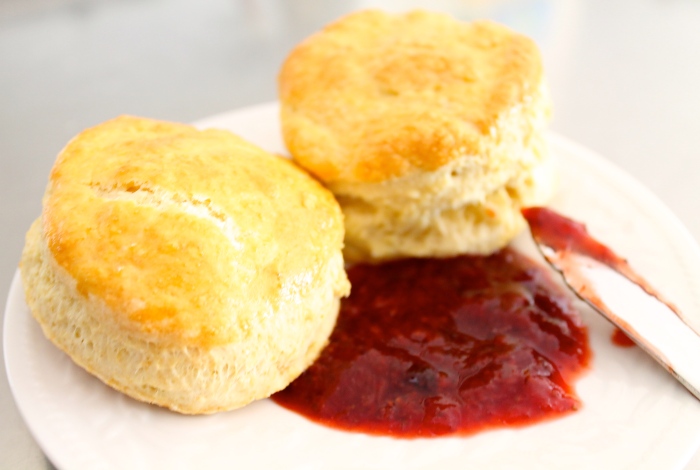
The best part of making jam is eating it! Since I don’t like mine so sweet, the 3 cups were perfect but if you prefer it a little sweeter feel free to adjust! While my jam was boiling I started on some traditional English scones, not the sweet confectionary variety they usually sell here in the US, that’s perfect with the sweetness from the jam. As you can see in the picture I was a little impatient and ended up spreading the hot jam on the hot scones before it set (it was worth it!).


Yummy! This looks incredible. I’ve never made jam but have just planted lots of strawberries and red currants so hopefully I can make some of this in August (I’m in SW UK) .
LikeLike
That sounds amazing! I wish I had some in my backyard too but hopefully someday soon 🙂
LikeLiked by 1 person